

Tree Swallow Transparent Watercolor & Time-Lapse Video
This was a quick watercolor-and-ink painting. I had been concentrating on doing highly rendered watercolor paintings for a while and thought it would be fun to whip off a less-detailed, quick, inked piece with bragged-up colors. This Tree Swallow was … Continued
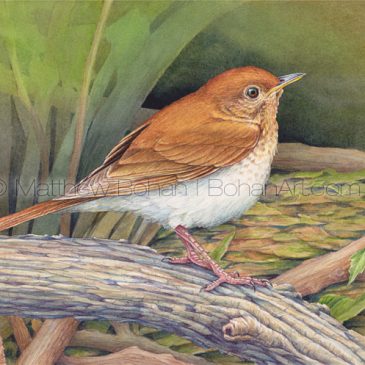
Veery Transparent Watercolor & Time-Lapse Video
This Veery painting is another transparent watercolor on Arches 140lb Hot Press paper. I’ve been teaching a watercolor course this year for a small group of homeschoolers. It’s been fun to watch the kids’ progress. They have produced a lot of … Continued
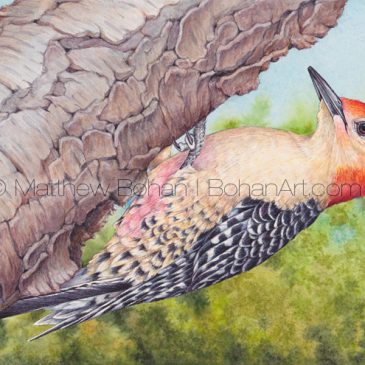
Red-bellied Woodpecker Transparent Watercolor and Time Lapse Video
It’s taken me a while to post this painting, my first of 2017. Don’t worry, I’ve been hard at work and very productive, but posting completed projects has been neglected. This Red-bellied Woodpecker was fun to paint. Using a 400mm lens I … Continued
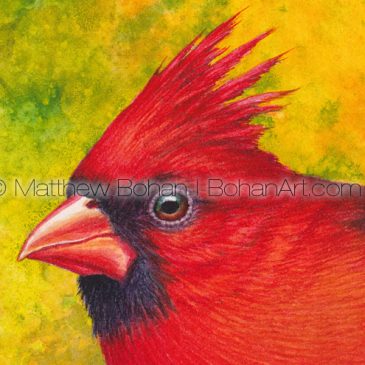
Fall Northern Cardinal Transparent Watercolor & Time-Lapse Video
Everyone seems to like cardinals. I think the only time I wasn’t happy to see one was when I was birding in Hawaii, where they are an invasive species. This was an unusual painting for me. Anyone looking at my portfolio … Continued
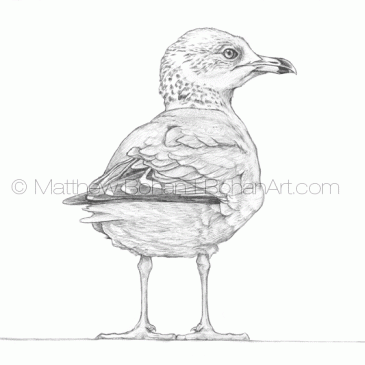
Immature Ring-billed Gull Pencil Sketch p74
I haven’t painted many gulls. Only two come to mind, Herring Gull and Ring-billed Gull. Ring-billed Gulls are almost dirt common. I’ve heard them called rats with wings. Despite some of their less appealing behaviors, I really like Ring-billed Gulls. I … Continued
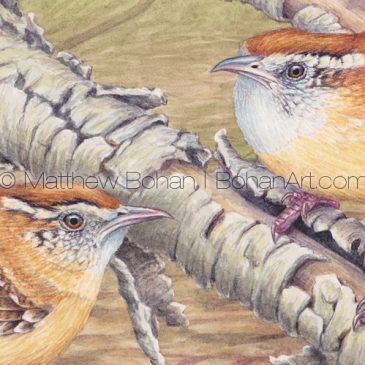
Carolina Wrens: 7×10-inch Transparent Watercolor and Time-lapse Video
Carolina Wrens are fun little birds. They seem to be clever. My office and studio are in the basement of our house. It’s a nice space with one drawback: I have a only a small window well for natural light. I … Continued
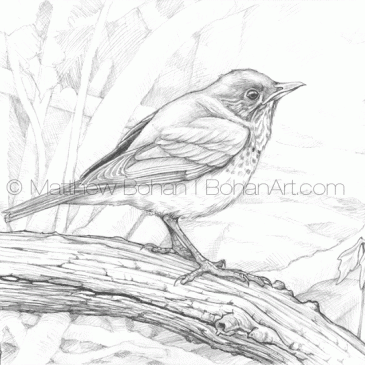
Veery Pencil Sketch p73
Who could possibly pick a favorite type of thrush? I love them all. Veery are especially pretty and have a beautiful call to match. If Mozart were a bird, he’d have to be a thrush. Veery have a musical descending … Continued
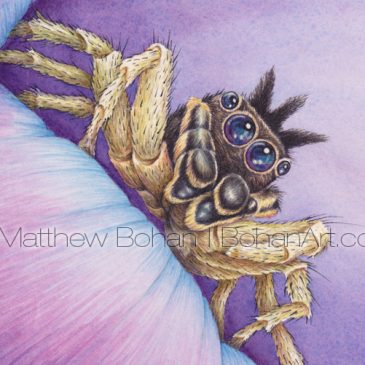
Male Dimorphic Jumping Spider (Dark Phase) Transparent Watercolor & Time Lapse Video
“My name is Matt, and I like Jumping Spiders.” Typically when people see my photos, sketches or paintings of jumping spiders, I hear the same things: “Yuck!” “The only place I want to see that is on the bottom of my … Continued
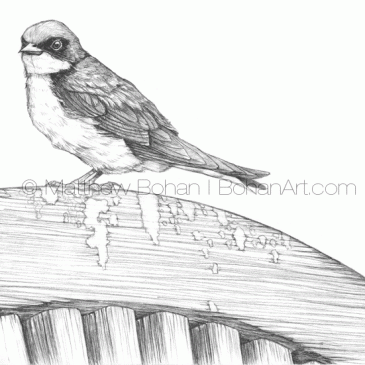
Tree Swallow Pencil Sketch p72
Work really picked up for a while, so I fell behind with posting paintings and sketches. I have a back-log of sketches to scan and write up. This is a Tree Swallow from Ottawa NWR in northern Ohio. I can really … Continued
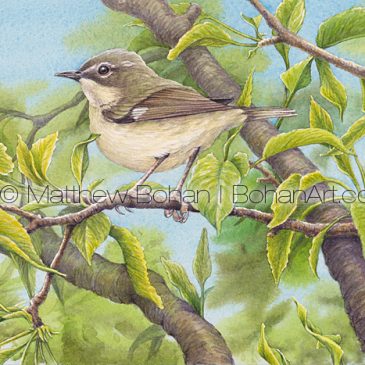
Female Black-throated Blue Warbler Transparent Watercolor & Time Lapse Video
Back to the drafting table! This is a small 7 x 10-inch transparent watercolor of a female Black-throated Blue Warbler. I’ve painted a male before; those bright colors were asking for it. The females, while drab in comparison, are still … Continued