
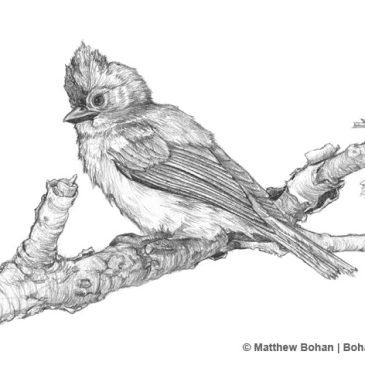
Juvenile Tufted Titmouse Pencil Sketch
This past summer we were lucky to have a band of four or five juvenile tufted titmice hanging around the feeders and bird baths. I’ve never seen a titmouse that didn’t fall under the “cute” category, but these were especially … Continued
Red-bellied Woodpecker Pencil Sketch
Red-bellied woodpeckers come to the suet feeders around our house in the winter. They really are quite spectacular birds. You get accustomed to the size of the downy woodpeckers, so when you see a red-belly they seem huge by comparison.
Tennessee Timber Rattler Pencil Sketch #2
Here is a sketch of another timber rattler from our trip to Tennessee. This guy was only two feet from the one in the previous rattlesnake drawing. While both snakes were on the small size, this one was a bit “beefier.” I … Continued
Black-capped Chickadee Pencil Sketch
I drilled out a few logs with my drill press to make a more natural looking suet feeders. I tend to hang them at a 45º angle with the suet hanging below to discourage some of the “junk birds” like … Continued
White-breasted Nuthatch Pencil Sketch
Although they are really common, there is something endearing about white-breasted nuthatches. One winter day almost twenty years ago, my wife and I went to a local park where chickadees were acclimated enough to humans to eat out of our hands. … Continued
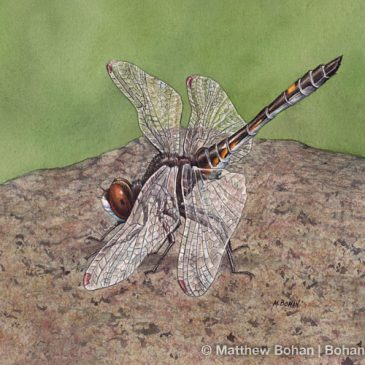
Dot-tailed Whiteface Dragonfly Watercolor Step-by-Step
Another step-by-step through the creation of a Dot-tailed Whiteface dragonfly in transparent watercolor. Original painting is available here. Prints are available here.
Tennessee Timber Rattlesnake Sketch
I’ve been lucky to see a variety of rattlesnakes over the years. I’ve seen eastern diamond backs, pygmy rattlers and massasagua rattlesnakes. I spent a lot of time in NY/NJ looking for timber rattlers with out much luck. I knew … Continued
Calico Pennant Dragonfly Pencil Sketch
I found this pretty dragonfly covered in dew one cool morning. It was perched in a field next to our house waiting for the sun warm up the old flight muscles.
Peach-faced Love Bird Pencil Sketch
Here is a pencil sketch of our pet peach-faced lovebird Sluggo. He is over 17 years old now and prefers to walk or take a ride on your shoulder to flying. He is a great pet. Sadly, he has outlived … Continued

Eastern Pondhawk Pencil Sketch
Eastern pondhawks are pretty common dragonflies. Males and females are both strikingly beautiful.